

Atari ST - Neocept, Inc. - 1988
WordUp
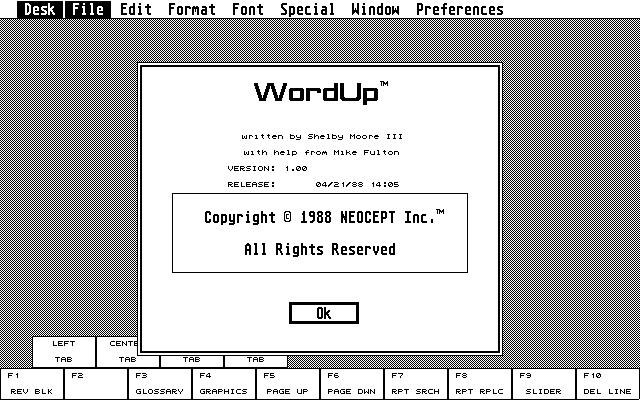
- Genre
- Word Processing
- Year
- 1988
- Language
- [unknown]
- Publisher
- Neocept, Inc.
- Controls
- Mouse / Keyboard
- Distributor
- —
- Resolution
- Medium / High
- Developer
- [n/a]
- ST Type
- ST, STe, TT / 0.5MB
- Licensed from
- —
- Programmer(s)
- Fulton, Mike / Moore, Shelby
- Country

- MIDI
- —
- Software
- English
- Version
- 1.0
- Box/Instructions
- English
- Number of Disks
- 3 / Single Sided
- License
- Commercial
- Dump
- Download
- Serial
- —
- Dump format
- —
- Protection
- —
OTHER VERSIONS WITH THE SAME TITLE (5)
INSTRUCTIONS
Manual Changes & Additions -- 3/22/88

This file contains additions and error corrections for the WordUp
manual.  You can print this and insert it into your WordUp manual
for quick and easy access.

System Disks

System Disk #1 and the Program Disk are single-sided disks.
System Disk #2 is a double-sided disk with a broader selection
of character typefaces and pointsizes (fonts) than System Disk
#1, and is intended for users of 1040ST or Mega ST systems, or
520ST owners with at least 1 megabyte of memory and a
double-sided disk drive.

Owners of unmodified 520ST systems will find that the amount of
memory available for your documents is small.  You may not be
able to import DEGAS or NEOCHROME pictures into your
documents, but only smaller *.IMG files.  Using the color monitor
instead of monochrome will increase the amount of memory
available, because the color fonts use less memory.  You can also
gain memory by reducing the number of fonts which are installed.
See Appendix B for information on how to do this.

Installing WordUp

In the Setting Up section, on pages 2-17 and 2-24, there is a
picture of a window with three icons in it.  Please disregard the
second two icons.  Also, the first one, titled GDOS18.PRG, is the
same program as the one refered to in the text as GDOS.PRG.
Please disregard the difference in names.

For Hard Disk Users: In step 16 on page 2-20, and in step 14
on page 2-27, you are told to copy only WORDUP.PRG and
WORDUP.RSC from the Program Disk to the hard disk folder
you have just created.  However, you should copy ALL of the
files on the Program Disk to this folder.  After you have
completed the tutorials in the WordUp manual, you may delete all
files except WORDUP.PRG, WORDUP.RSC, and
WORDUP.GLO.

Running WordUp

In the Getting Started section, page 3-3, you are told how to run
WordUp from a double-sided disk drive system with either one or
two disk drives.  Please note that if your system has enough
memory and two double-sided drives, then you may wish to use
more fonts than will fit on the combination Program/System disk.
In this case, you may use two separate double-sided disks in a
manner similar to that described for users of a two-drive,
single-sided system.  If you decide to use this method of
having separate Program and System disks, then WordUp
cannot reside within a folder.

Using WordUp

In the Using WordUp section, page 4-1, after where the text
reads "of your copy.", please insert the following text:  If you
have a one disk, single-sided system, then make sure the Program
Disk is in drive A.

Tutorials

On page 6-1 of the Tutorial #2 section in the next to bottom
paragraph, and on page 7-1 of the Tutorial #3 section in the top
paragraph, after where the text reads "from the File menu", please
insert the following text:  If an alert box warns you that changes to
your file will be lost, choose the "Close" button.

In the Tutorial #3 section, page 7-19, you are told how to insert
a graphic.  If you have an unmodified 520ST system with only
512K of memory, you must make the following change:  you
must change the text that says "Click on Degas " to read "Click on
*.IMG "   The "CHART.PI3" file mentioned should be changed to
"CHART.IMG"  This is because memory space is very limited on
a 520ST system, and the graphic mentioned is too large to fit.
Therefore, a smaller version of the graphic has also been included.

In the Tutorial #3 section, page 7-22, please the delete the
sentence that starts with "You can also move the..."  The Move
Graphic function mentioned here was removed after the manual
was printed. Testing showed that because of the reformatting of
text, it was easier to move a graphic by cutting it as a block and
pasting it back at the desired position in the text.

Printing

In the Reference Section, pages 8-15 & 8-98, the description of
the Print dialog box mentions a button called Descending .
However, this button is not available in this version of WordUp.
This feature will be available in a future update to WordUp.

Margins

On page 8-52, paragraph #2, delete the text that reads: "(see the
item Show Ruler  in the Configuration menu choice description
if the menu isn't visible)" The ruler is always shown at the top of
the window.

Tab Stops

When inserting Tab Stops, unpredictable results may occur if you
attempt to use more than 30 different tab stops on the ruler in any
one section.  DO NOT USE MORE THAN 30 DIFFERENT
TAB STOPS IN ANY ONE SECTION.  (A Tab Stop is the
position where the text cursor jumps to when you press the [Tab]
key, marked on the ruler with a "L", "R", "C", or "D".  You can
press [Tab] as many times as you want in a section; these are
Tabs, not Tab Stops.)

Insert New Line - Enter Key

The [Enter] key no longer works identically to the [Return] key.
The [Return] key used by itself still inserts a New Paragraph
marker, while the [Enter] key used by itself now inserts a
Carriage Return marker (which can also be done with
[Shift][Return]).  The description of New Line on Page 8-64 of
the Reference Section should be changed to indicate this.

Face & Points

In the Reference Section, page 8-75, the description of the
Face & Points dialog says that you can scroll through the
selection of fonts by clicking the mouse on the up or down arrows
of the dialog.  However, this feature is not implemented in this
version of WordUp.  This will be added in a future version.

Graphics

In the Graphics... description of the Reference Section, on
page 8-86,  the text mentions that you cannot import DEGAS
*.PI3 graphics when you are using a color monitor.  This is not
correct.  You can use DEGAS *.PI3 picture files on either
monitor.

In the description of Graphic Options, page 8-89, there is an
addition to the paragraph on Cropping .  Add the following text to
the bottom of this paragraph:  Note: If the upper left-hand corner
of your desired cropping rectangle happens to fall on one of the
other buttons, then you will have to use the Graphic Options
dialog to specify the cropping rectangle.

On page 8-90, delete the text that reads "position on the page,"
from the first paragraph.  On page 8-92, on the last line, change
the text that reads "bottom-left corner" to "bottom-right corner".
On page 8-91, the values for Cropping  in the picture at the top of
the page are not valid.  The Bottom:  value should read 350, not
0.

Mail Merge

You may enter the default mail merge field delimiting characters
"®" & "¯" by pressing [Right-Shift][4] and [Right-Shift][5] while
in Extended mode.  You enter (and exit) extended mode by
choosing Extended Mode from the Font menu.

Configuration/Save Preferences

In the Configuration description, page 8-111, and in the Save
Preferences description, page 8-122, the following text should
be added at the end of the description on Save Cut Block When
Exit:  For this feature to work correctly, one-drive system users
must have their System Disk (or combination System/Program
Disk) in drive A before leaving the program.  Users with
two-drive systems must have the Program Disk in the drive from
which they started the program.

Also on page 8-122, you should delete item #9, and add the
following:

10.  Text Attributes at the top of the current document.
(i.e. styles such as Boldface orSkewed,  as well as the
pointsize and typeface.
11.   All formatting for the 1st paragraph and section of
the current document, including line spacing, margins,
justification, and tab stops.
12.   The current screen color settings.  These will be
automatically used the next time you run WordUp.

Keystrokes

In the Reference Section, you should add the following text at
the bottom of page 8-2:  Note: For certain keys, WordUp will
prevent key-repeat from occuring after the key is released.
These keys will repeat only as long as they are held down.
However, if you manually repeat the key by hitting it and
quickly releasing it several times in succession, then WordUp
will use all keypresses.  The affected keys are:

Up-Arrow
Down-Arrow
Right-Arrow
Left-Arrow
Delete
Backspace
Insert.

Changing ASSIGN.SYS

Change paragraph #1 on page B-5 to read:

To modify the ASSIGN.SYS file using WordUp, open a
new document with a name not already used by another
file.  When the window appears on screen, make sure your
System Disk is in the drive, and choose Insert ASCII
from the File menu.  If necessary, change the Directory:
line of the file selector to indicate the correct drive (see
appendix A if you are unsure how to do this) and click on
the Up Arrow box.  Now type in "ASSIGN.SYS" and hit
[Return] and your existing ASSIGN.SYS file will be read
into your window.

Change paragraph #1 on page B-7 to read:

When you are done changing the font filenames and/or
printer driver name, you need to save your file.  Make
sure your System Disk is in the drive, and choose the
Save ASCII... function from the File menu. If
necessary, change the Directory:  line of the file selector
to indicate the correct drive (see appendix A if you are
unsure how to do this) and click on the Up Arrow box.
Now type in "ASSIGN.SYS" and hit [Return] and your
new ASSIGN.SYS file will be written to your System
Disk.

The example ASSIGN.SYS file on page B-7 is for illustration
purposes only.
ADS (3)
ARTICLE (1)
Presentation
BOOK / MAGAZINE REVIEWS (2)
ST / Amiga Format · July, 1988Rating: 3.5/5
ST Format · November, 1990Rating: 79%